How is Kundalini Yoga different from other yoga?

There are several types of yoga practices, so it might not be very clear to find the right one for your body. Different yoga practices focus on particular aspects such as breathing, heart, sound, spiritual, physical body, and much more. Every yoga practice is unique in its way. Yogi Bhajan first introduced Kundalini yoga in the late ’70s.

From all other different yoga practices, it is considered the most mysterious yoga practice. Derived from the Sanskrit word ‘Kundal,’ it means coiled energy and is a combination of breath, sound, and meditation. It is also referred to as the body and mind’s science to elevate the spirit without boundaries and discrimination.

Key differences explained:

There are a few distinguishing features that make Kundalini yoga different from other yoga practices. This includes:

Kriyas:

In each class of Kundalini yoga, there is one kriya which provides a specific effect like navel adjustment kriya, kriya for conquering sleep, or kriya for elevation.

Effective postures:

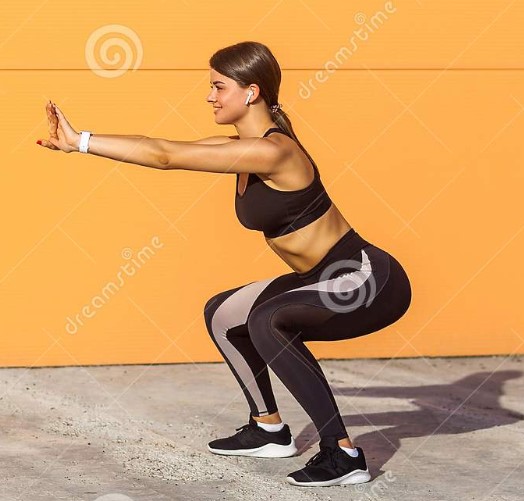
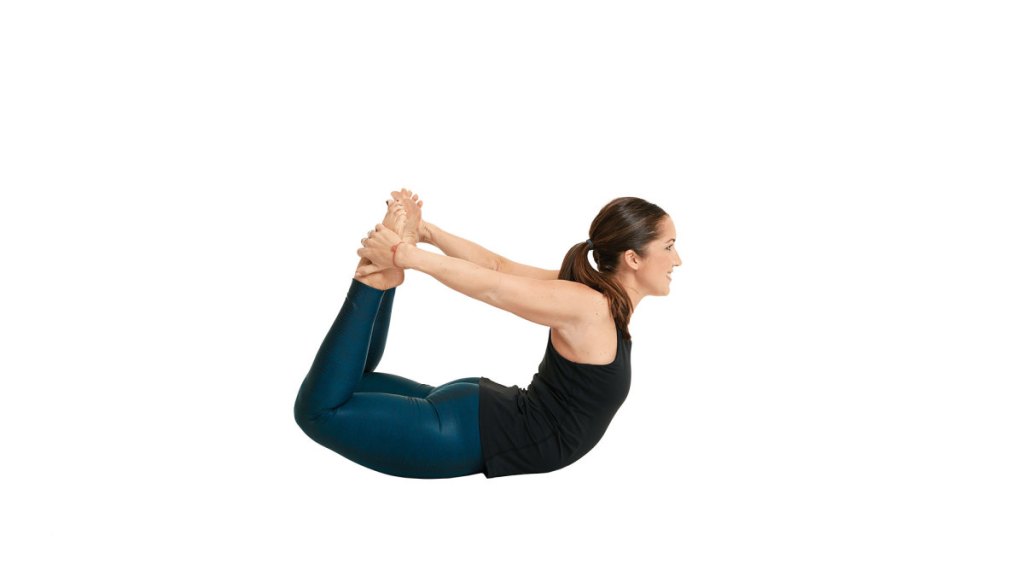
Kundalini yoga consists of elements including all yoga forms like Ashtanga, Hatha Yoga, Shakti, Raj, and Tantra, etc. involving vigorous movements.

Focus on pranayamas:

Kundalini yoga focuses mainly on pranayamas (breathing exercises). It uses rapid, rhythmic, energized pranayamas such as a breath of fire performed within itself or with other postures.

Filled with mantras:

You can find a large number of mantras available with Kundalini yoga. All these beautiful mantras provide peace of mind to focus on something. It has the power to change negativity and breakthrough self-constraints. It helps to regulate the breath and creates silent meditation more blissful. It contains mantras for inner peace, courage, protection, happiness, and intuition, etc. under the sun.

Meditations:

Kundalini yoga consists of thousands of meditations with individual purposes. In order to encourage the meditative, it is highly important to have a neutral mind.

Tuning in process

Whenever a Kundalini yoga class starts, it becomes essential to follow a process referred to as ‘tuning in’ where everybody has to chant the phrase ‘Ong Namo Guru Dev Namo,’ which means ‘I bow to the divine teacher within.’ It helps in connecting you with the teachings sources of Kundalini yoga.

Music involved

https://samadhiyogaashram.com/online-kundalini-yoga-teacher-training.php

Kundalini yoga has a wide variety of dialects and languages, along with plenty of mantras/music that is encouraging and beautiful.

Develop connection within

Kundalini yoga is an innovative yoga practice that helps connect you with your inner potentiality, react to those things that lower energy, and rejuvenate vitality and energy.

Source of a good workout

Nothing can take out spirituality from Kundalini yoga. It offers a good workout for your complete body, including abs, thighs, and cardio.

Enhance flexibility

Kundalini yoga helps in enhancing your body flexibility. There are a few postures that can be effective in making your body flexible in a faster way.

Balanced mind, body, and spirit

Kundalini yoga tradition brings deep connection in your body, mind, and spirit. This further boosts a positive attitude toward physical and emotional health.

About the master

Yogi Bhajan is the person who introduced Kundalini Yoga to the west and taught many about its teachings.

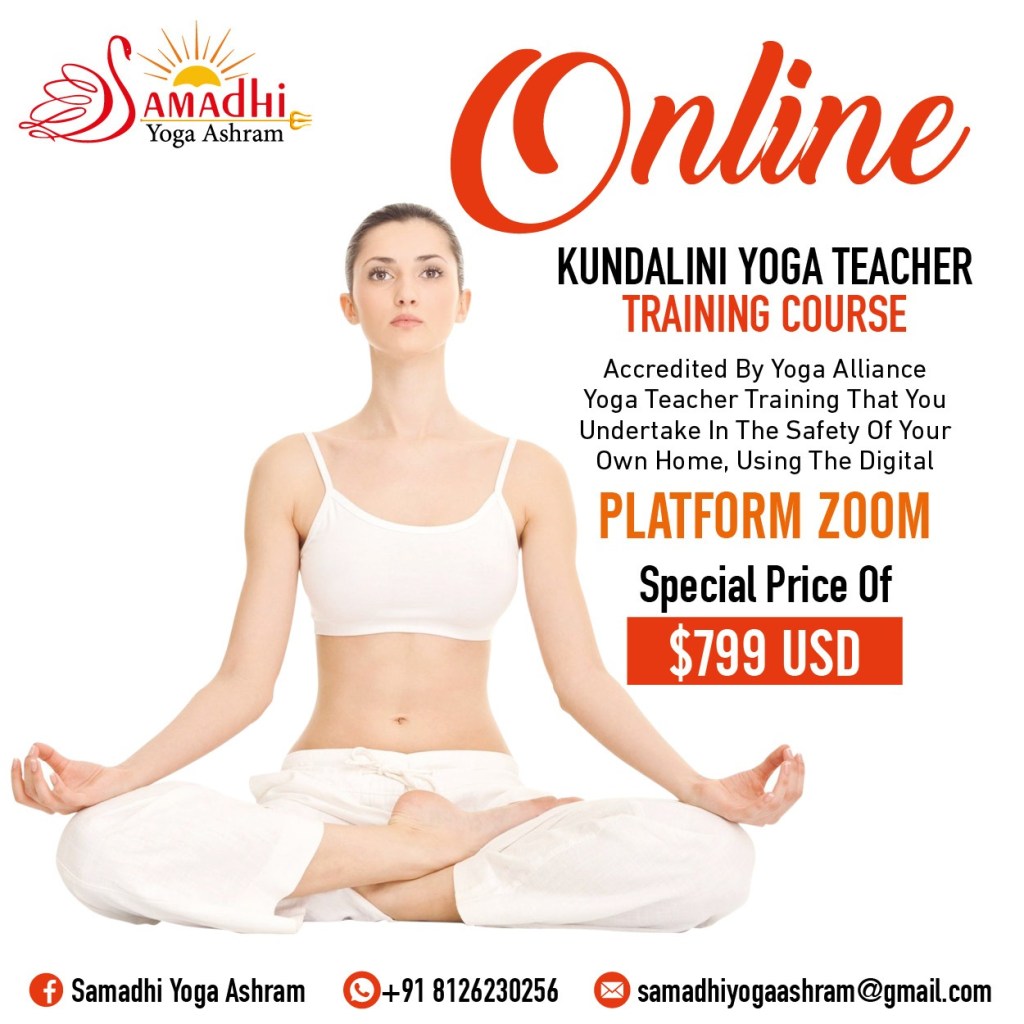
Interested in Kundalini Yoga Join our Kundalini Yoga Teacher training course to fill the powerhouse within you.

BENEFITS OF TAKING ONLINE YOGA TEACHER TRAINING

Hopefully you are looking to be a yoga teacher and this lockdown creates difficulties for you to achieve your purpose. But do not worry your dream can be possible. Online yoga Teacher Training Program is the best option and it is a fast growing business because thousands of yoga students are interested to do online yoga training. You may be thinking why? There are so many benefits to do online courses. We are thinking same way as you do. When lock down stated because of Corona Virus we start this with a feeling that it will not work. But immediately we stated promotion we got best result and from the beginning our hope got doubled. 12 students participated and we had an amazing review and they got fully satisfied. Now they are teaching yoga.

Learning Yoga from the root has a different experience. That’s why our students encouraged us to do and we would like to thank them. They have shared their experiences and this article is based on the experience of our online studnets.  Here I am going to share with you what you can get from online training.

Before you do any yoga teacher training course either online or offline you must understand what actually searching for?

  • Best Training
  • Best communication with teachers
  • Focused training
  • Understaning each and everything that is taught in the syllabus
  • Effordable price
  • Comfortable stay
  • Sattvic Food that you would like to eat 
  • Yoga alliance certificate
  • Less trouble
  • Security and so on

If you get everything in online classes then whats problem? If you are thinking you want to come to Rishikesh or India then great? But it is all depend on the circumstances. But you are free to do now in your room in online program.

Best Training:

In Online Yoga course Teachers and students both are relaxed because they do not do so much travelling, they have enough time to rest and prepare in their room so teacher give the 100% attention. That’s why we prepared big screen for the teacher to communicate with the students and asana teacher also see clearly the body position to guide if a student do any mistake. 

Best Communication with teachers:

As student is practicing alone, he or she is always free to ask any questions. There is a microphone is always connected with the ears of the teacher so the communication is very easy. In the normal class even it is difficult and here in online program you feel you are most connected with the teacher.

Focused Training:

Online Training is more focused then offline. Because you need to present ontime in your classes and there are assignment you need to complete regularly. There is a inner flow of guidance from the teachers. The Guru of the ashram like yogi Vishnu always guide to the online students and he directly communicate to improve the quality of teachings. 

Same Syllabus:

The online yoga teacher training course covers almost all the topics that normally a yoga school teach in normal TTC program like Hatha, ashtanga, vinyasa, kundalini whatever yoga style you choose and with that pranayama, bandha, mudra, meditation, pranayama, philosophy, anatomy, yoga pshychology and so on. We have experienced that even when we provide online dance classes students enjoy so much and it is very much possible.

What you not receive in online TTC:

Only thing what you miss that you can not walk in the street of Rishikesh and any place you choosefor the training. Same emotion, feelings, and even I feel more deeper connection with the school and teachers. You can not eat and sleep here but they are not the most important topic in the training.

Affordable Fee:

Normally the yoga TTC iin the west it is about 4000 to 5000 USD and that goes5 to 6 months. Here regularly you will get 6 hours of training and rest you will do self practice and study in order to complete the 200 hours training. Also it is far cheaper and you can do from the orgin. Normally the course fee is less then 1000 USd, in Samadhi yoga ashram the online monthly yoga ttc is 500 to 800 USD depending on the course. That can be affordable for many students.

Comfortable stay:

You will have a great chance to stay in the most luxurious room that is your home. So all you need is available there always and you can adjust your time according to your comfort.

Best food:

Many people has different energies and interest of eating food.you can cook for yourself as you like and eat. Some schools like us we provide some online cooking classes for students so they can use that for them. 

Accreditation:

Online yoga course is accredited by yoga alliance and anybody after the successful completion they will be certified and they can registered their certificate with the directory of yoga alliance.

Less trouble:

Online yoga course do not require travelling, packing, and worrying of anything. 

Best Team of teachers:

It is very much possible to have best teachers in the course because anybody can teach from anywhere. Noteachers need to travel to school to teach. Like we are connected with the great teachers and therapist and we invite them sometimes to share there success and experiences to encourage our studnets.

Although direct teaching is very important and there is a different taste to sit with the Guru and learn yoga properly. The Schreen teachings is also a great idea when there is no option for direct connection.

Thank you for reading my article and if you like please share with your friends and promote yoga and you can join us for any yoga training in Samadhi yoga ashram

The Best Yoga Postures to Boost Your Digestion

Yoga refers to” union”. Unlike the standard definition of the latter, union in Yoga refers to the union to God or the attainment of ego-self with the infinite spirit. It is a spiritual discipline, art, and science. One can feel the overall benefit of practising yoga with the improvement of the soul and mind.

This post will not only outline different yoga postures for improving your digestive health but also show you how practicing them regularly can produce noticeable results.

Why is yoga important for digestion and the overall functioning of the body?

Practising yoga benefits both the physical and mental disciplines. It plays a key role in achieving a peaceful state of both the body and mind. Yoga is a beautiful art of managing stress and anxiety. It boosts blood circulation, thereby keeping you relaxed. Besides, it also makes a positive contribution to the overall functioning of the body by increasing its flexibility and strengthening the muscles.

Often the digestive system gets hampered when one eats spicy foodstuffs. As a result, one suffers from food intolerances, allergies, and other associated problems. The gastrointestinal tract is often quite sensitive to emotions. By calming down the body as well as the mind, yoga keeps it in a relaxed state. This fosters better digestion and keeps the belly in shape. Practising proper yoga positions helps boost the secretion of fibre and digestive enzymes. There are twists and turns involved which help wring out the gastrointestinal tract and let things keep moving.

Yoga postures to get a proper functioning digestive system

Cramping, indigestion, constipation and bloating are naturally controlled by following good yoga positions.

1. Wind relieving posture or Pavanamuktasana

This is a perfect yoga position helping you to combat sluggish digestion. The posture helps trapped wind to move out of your body. Taking this pose slowly helps you to get the pose associated with breath. When you draw your knees into your chest, you simply exhale. This is accompanied by inhaling. The practice is a highly recommended one just before going to bed.

2. Peacock pose or mayurasana

This is one of the highly recommended postures. Practising this position helps you see the results quickly. It helps you attain proper digestion in no time. All you need to do is apply pressure on the digestive tract and organs. Balancing your body weight on the arms cuts the blood circulation to digestive organs. As soon as you release, there is a gushing supply of fresh oxygen-filled air into your body. The position helps improve blood flow and boost overall digestive activity. This position also helps the movement of stuck food.

3. Half Lord of the Fishes or Ardha Matsyendrasana

This posture mainly comprises of twists to boost digestion. The posture gives a specific ability to enhance the digestive system, to improve circulation, and bowel movement. With a twisting, you naturally reduce blood flow to the regions incorporating the digestive organs. On releasing this posture, “oxygenated” blood rapidly moves into the digestive organs.

4. Corpse pose or savasana

A resting position helps to trap the fresh air into the parasympathetic nervous system. This posture works on the “rest and digest” response system. Lying down still helps reduce stress, and thus helps create a healthy environment. If you remain in this position will improve the flow of blood from different parts of the body to the digestive tract. The posture helps boost oxygenation to the digestive tract. The pose helps in proper blood flow, cleansing, healing and bowel movements.

5. Seated Forward Fold or Paschimottasana

This posture is for stretching and lengthening the back. Apart from boosting the posture, it also improves digestive health. All you need to have is a pillow on your thighs, thus allowing the belly to rest upon the pillow when you fold in the forward direction. This position is particularly beneficial in creating space for digestive massage. Repetitive mode causes compression. This is followed by exaltation and compression. It may seem a little tricky to you early on. However, you will get used to it if you follow it regularly.

If you are facing any problem related to digestion, you must give these positions a try. The surprising results will be surely appreciated. Wish you good health!

What Are The Best Yoga Poses to Increase Flexibility

Flexibility is one of the key benefits of practicing yoga. As we getting old our body starts losing its flexibility and improper posture, stress and sedentary lifestyle added more thereto. If you’re someone who is looking to extend your flexibility then you do not need to look further aside from the yoga. Gaining flexibility features a huge benefit because it improves joint health, provides a greater range of movement, and prevents back pain and other bodies ache. Although there’s an enormous misconception about yoga that only people that are super flexible can practice it but it absolutely wrong as yoga is for everybody. When it involves increasing flexibility through yoga then there are various yoga styles like Hatha or yin yoga.

However, there’s various yoga which will assist you to extend flexibility. Here are a number of the simplest yoga poses to improves flexibility

Uttanasana:

Stand in a tadasana keeping your feet hip-width apart. Inhale and stretch your arms above the top and with an exhale bend your upper torso from the hips. Rest your arms near your feet and let your head hang freely. Bend your knees a touch to avoid the rolling of your back. Stay within the pose for few breaths then release from the pose.

Uttanasana or standing forward fold may be a great yoga poses to stretch your hamstring. The more you practice this the more you become better at it.

Adho Mukha savasana

Come down on your four together with your knees underneath your hips and wrist under your shoulder. Now curl your toes under and lift your hips towards the ceiling to form an inverted ‘V’. If you’re a beginner then bend your knees touch and fix your gaze towards the naval. Hold the pose for few breaths then release gently.

This is the simplest yoga pose extend your flexibility because it stretches your tight hamstrings and whole back area of the legs. Also, it opens your and chest and shoulder muscle. With continuous practice, you’ll notice that your back is flattened.

Eye of the needle- Sucirandhrasana

Lie down on your back and bend your knees. Now cross your left ankle onto your right thigh and clasp your back of your right thigh with both the hands and convey it towards the chest. Stay within the pose for 10 to 30 seconds then repeat it with another leg.

If you’ve got a decent hip then the attention of the needle is best to open those tight hips. It strengthens and prevents any quite injuries in your hips, spine, and abdomen. Also, with regular practice, it helps reducing fat from butt, belly, and thigh region which is taken into account together of the foremost stubborn fat.

Reclined Hand to great toe Pose (Supta Padangusthasana)

Lie down on your back keeping your legs stretched outward. Bend your knees together with your soles flat on the mat. Now pull your right knees towards the chest and grab the toe or put a yoga strap around your right toes and extend it towards the ceiling. Stretched your left leg on the mat and place your fork over your left thigh. Stay within the pose for few breaths then repeat it with another leg.

Supta Padangusthasana is great to pose when it involves stretching your hips, groin, hamstring, and calves muscles.

Garland pose (Malasana)

Stand on the yoga mat keeping your feet a minimum of 10 to 12 inches apart. Now slowly turn your toes and bend your knees during a deep squatting position. Bring your elbows inside your knees during a Namaste position ahead of your chest and use your elbows to push your knees further. Stay within the pose consistent with your comfort then release gently.

Garland pose or malasana opens your hips and groin areas and strengthens your ankles also.

These are the simplest and straightforward yoga poses to extend your flexibility. However, you’ve got to recollect that yoga may be a mind and body approach that shows its effect on the entire body.

Kundalini Meditation


                           Kundalini Yoga Teacher Training in RIsikesh

Among all 72,000 nadis, there are three major nadis. Sushumna Nadi which goes along the spinal cord, Ida Nadi starts from the left side of the body and Pingala Nadi which starts from the right side of the body. These three nadis start from the root chakra and they move along with the spine but the kundalini Shakti resides in the Muladhara chakra in the root center. When the kundalini Shakti awakes it moves through Brahma Nadi which resides in the Sushumna Nadi. Brahma Nadi is a passage to brahman. While the Ida and Pingala run outside the spinal column, the Brahma Nadi runs within the column. It extends from the base of the spine to the brain. Sushumna awakening meditation is the most powerful meditation in this energy movement. 

Instructions to follow :

  • Bring your attention to your body.
  • Observe your body from head to toes and up from toes to head again.
  • Relax your mind completely.
  • Keep your spine erect and neck in line with your spine.
  • Relax your forehead, eyes, eyebrows, and facial muscles.
  • Relax your nostrils, mouth, jaw, and chin.
  • Relax your shoulders, upper arms, wrists, fingers up to the fingertips.
  • Relax your chest, stomach, and naval area.
  • Relax your upper and lower back.
  • Relax your buttocks, hip joints, thighs, and knees.
  • Relax your calf muscles, ankle joints, feet, and toes.
  • Now take inhale from your nostrils all the way down to your root center.
  • Inhale from the base of the spine and let it come up to your third eye center. And move through the throat center, heart center, naval center, sacrum, and root center, and feel the Muladhara chakra getting energized.
  • Exhale from the root chakra getting purified, remember the quality of your root center, color, and petals of the root chakra.
  • When you inhale, feel the white light like a star is moving from top to the bottom and reverse. This light is moving along with the spine.
  • Keep your spine straight, and imagine your spine like a golden pipe and feel like the white light is moving along with the golden pipe with your breathing.
  • Feel that light is going down to the root center and hold your breath and squeeze your anal sphincter. And exhale light goes up.
  • And repeat the same with each inhales and exhales.
  • Feel the sensation in your root center and roll your tongue up in kechari mudra. So that your energy will not drain upward. 
  • With the mula bandha in the root center, you prevent your energy from draining downward.
  • Let your energy flow from top to bottom along with the spine.
  • Feel the movement of light in your spine.
  • Keeping your tongue up in the kechari mudra in the upper pallet and keep releasing and squeezing your anal sphincter. 
  • Listen to your inhale as “so” and exhale as “ham”. And feel the light goes up and down. Connect yourself with the earth element.
  • Feel the heat generated in the root center and go up to the swadishthana chakra which governs the water element.
  • And the earth, its heaviness and feel the soothing of flow and flow of your consciousness.
  • Inhale and exhale from the down to up to the second center to the top. Feel the water element move in the upward direction.
  • Let the light of the star flow from bottom to up to the second center with “ham” of exhale.
  • Now inhale and hold your breath and squeeze your genitals in Ashwini mudra and release. We hold the energy in different mudras. All our desires for enjoyment exist in the second center.
  • Keep inhaling and exhalation.
  • Now vanish the water element and move towards the fire element.
  • Bring your attention to your third chakra, Manipura chakra with a fire element. your earth and water element has vanished from your body.
  • The earth element and water element are dissolved in the fire element. You feel warmth and awakening. And you feel one foot above the earth.
  • Because you exist from above the naval. Inhale from top to the navel center and exhale from naval to up.
  • Practice diaphragmatic breathing. Relax your shoulders and arms.
  • Feel the fire and light at your naval. And let this fire burn all your karmic depths that have existed for thousands of years.
  • All the impurities and negativity vanishes. Feel the lightness in your body.
  • The fire energy moves to the heart center from the naval center.
  • Let the fire element dissolve in the air element.
  •  Feel the fire trapped inside the air element at the heart center, Anahata chakra.
  • Feel your heart center above the emotions,  feel yourself above the ‘pashu bhava’ , the animal consciousness.
  • When you are the heart center, the state of consciousness is ‘veer bhav’ , one who stays in the heart, one who has sensitivity.
  • With every inhale and exhale nourish the heart with the light and remove all the negative emotions.
  • Feel your spine getting shorter and feel yourself more above the floor.
  • Expand yourself and feel that you are the air element.
  • Feel that you have a body from the heart center to the crown center that you no longer have a lower body.
  • Everything is dissolved in your heart center. Now start your journey from ‘veer bhav’ to the god.
  • Control your negativity and emotions and rise from your heart and let your energy flow from the heart to the throat center.
  • Now feel the space and feel your spine getting shorter. And breath from your third eye to the throat center.
  • Make sure your breath is longer and deeper.
  • Feel your emotional, mental, and physical body is finished. And forget that you are a physical entity. 
  • Release the tension in your body and forget that you are a man or woman and you are just space.
  •  Let the space element and energy of your throat center, enter to your third eye center.
  • Earth, water, and fire element are dissolved in your third eye center.
  • You are above them. You feel nothing but a feeling of consciousness and existence.
  • Inhale from your nostrils to the third eye center and reverse
  •  Let the white light flow from your nostril to third eye chakra, Ajna chakra.
  • Make sure your breath is long, covering the small distance of the nostril to the third eye.
  • Do not make any sound while you are breathing.
  • Relax your forehead eyes and just feel the light in the third eye center.
  • Watch the light continuously and focus on your breath.
  • Enjoy the moment of silence and feel elevated from the ground.
  • Now try to hear the guru Diksha, initiation words from the guru in your right ear.
  • Feel those words in the form of vibrations and feel yourself in Samadhi now connect yourself with the master, guru.
  • Hear the endless sound which has no sound. Feel this sound penetrating your each and every cell of the body.
  • Feel your body energized and awakened. And your consciousness is elevated.
  • Join your palms together and receive the blessings of the guru from your right ear.
  • Now bow down and surrender yourself to the guru light and offer everything you have to the principles of the guru.
  • And slowly come up. Reserve this guru energy in yourself who destroy our negativity and impurities
  • Guru is the light within us which always awakens us and inspires us.
  • Chant three OM together.
  • End the session with the guru mantra.

10 Yoga Poses You Need to know

The building blocks of yoga are poses. These are good ones to learn as you build a regular yoga practice.

These 10 poses are a complete yoga workout. Move slowly through each pose, remembering to breathe as you move. Pause after any pose you find challenging, especially if you are short of breath, and start again when you’re breathing returns to normal. The idea is to hold each pose for a few, slow breaths before moving on to the next one.

Child’s Pose

This calming pose is a good default pause position. You can use child’s pose to rest and refocus before continuing to your next pose. It gently stretches your lower back, hips, thighs, knees and ankles and relaxes your spine, shoulders and neck.

Do it: When you want to get a nice gentle stretch through your neck spine and hips.
Skip it: If you have knee injuries or ankle problems. Avoid also if you have high blood pressure or are pregnant.
Modify: You can rest your head on a cushion or block. You can place a rolled towel under your ankles if they are uncomfortable.
Be mindful: Focus on relaxing the muscles of the spine and lower back as you breathe.

Child’s Pose

This should be your go-to pose whenever you need to rest for a moment during a yoga workout

Plank Pose

A commonly seen exercise, plank helps build strength in the core, shoulders, arms and legs.

Do it: Plank pose is good if you are looking to tone your abs and build strength in your upper body.
Skip it: Avoid plank pose if you suffer from carpal tunnel syndrome. It can be hard on your wrists. You might also skip it or modify if you have low back pain.
Modify: You can modify it by placing your knees on the floor.
Be mindful: As you do a plank, imagine the back of your neck and spine lengthening.

Plank

This common pose can build strength in the core, shoulders, arms and legs.

Four-Limbed Staff Pose

This push-up variation follows plank pose in a common yoga sequence known as the sun salutation. It is a good pose to learn if you want to eventually work on more advanced poses, such as arm balances or inversions.

Do it: Like plank, this pose strengthens arms and wrists and tones the abdomen.
Skip it: If you have carpal tunnel syndrome, lower back pain, a shoulder injury or are pregnant.
Modify: It’s a good idea for beginners to modify the pose by keeping your knees on the floor.
Be mindful: Press your palms evenly into the floor and lift your shoulders away from the floor as you hold this pose.

Four-Limbed Staff Pose

This pose builds strength in the arms, shoulders, wrists and back and helps tone the abdomen.

Cobra Pose

This back-bending pose can help strengthen the back muscles, increase spinal flexibility and stretches the chest, shoulders and abdomen.

Do it: This post is great for strengthening the back.
Skip it: If you have arthritis in your spine or neck, a low-back injury or carpal tunnel syndrome.
Modify: Just lift up a few inches, and don’t try to straighten your arms.
Be mindful: Try to keep your navel drawing up away from the floor as you hold this pose.

Cobra Pose

One of the simpler back-bending poses.

Tree Pose

Beyond helping improve your balance, it can also strengthen your core, ankles, calves, thighs and spine.

Do it: Great for working on your balance and posture.
Skip it: You many want to skip this pose if you have low blood pressure or any medical conditions that affect your balance.
Modify: Place one of your hands on a wall for support.
Be mindful: Focus on your breath in and out as you hold this pose.

Tree Pose

This balancing pose is one of the most recognized poses in modern yoga.

Triangle Pose

Triangle, which is a part of many yoga sequences helps build strength in the legs and stretches the hips, spine, chest, shoulders, groins, hamstrings and calves. It can also help increase mobility in the hips and neck.

Do it: This pose is great for building strength and endurance.
Skip it: Avoid this pose if you have a headache or low blood pressure.
Modify: If you have high blood pressure, turn your head to gaze downward in the final pose. If you have neck problems, don’t turn your head to look upward; look straight ahead and keep both sides of the neck long.
Be mindful: Keep lifting your raised arm toward the ceiling. It helps keep the pose buoyant.

Triangle Pose

This pose can be found in many yoga sequences.

Seated Half-Spinal Twist Pose

This twisting pose can increase the flexibility in your back, while stretching the shoulders, hips and chest. It can also help relieve tension in the middle of your back.

Do it: To release tight muscles around the shoulders and upper and lower back.
Skip it: If you have a back injury.
Modify: If bending your right knee is uncomfortable, keep it straight out in front of you.
Be mindful: Lift your torso with each inhale, and twist as you exhale.

Seated Half Spinal Twist Pose

Want to relieve the tension in your back? Try this twisting pose. 

Bridge Pose

This is a back-bending pose that stretches the muscles of the chest, back and neck. It also builds strength in the back and hamstring muscles.

Do it: If you sit most of the day, this pose will help you open your upper chest.
Skip it: Avoid this pose if you have a neck injury.
Modify: Place a block between your thighs to help keep the legs and feet in proper alignment. Or you can place a block under your pelvis if your lower back is bothering you.
Be mindful: While holding this pose, try to keep your chest lifted and your sternum toward your chin.

Bridge Pose

This pose, from the back-bending family of yoga poses, is great for stretching the muscles of the chest. 

Corpse Pose

Like life, yoga classes typically end with this pose. It allows for a moment of relaxation, but some people find it difficult to stay still in this pose. However, the more you try this pose, the easier it is to sink into a relaxing, meditative state.

Do it: Always!
Skip it: If you don’t want to have a moment’s peace.
Modify: Place a blanket under your head, if that feels more comfortable. You can also roll up a blanket and place that under your knees, if your lower back is sensitive or bothering you.
Be mindful: Feel the weight of your body sinking into your mat one part at a time.

BENEFITS OF CHAIR POSE

Sitting on a chair is always comfy and cozy. But it has the most adverse effects such as heart diseases, diabetes, obesity, back pain and more. Instead, if you sit on an imaginary chair, the effects are contrary. You will gain lot of benefits to your body. Sounds interesting, right? Chair pose or Utkatasana is powerful posture which composes many bodily merits. Let’s hop on to know more about it.

How to do chair pose?

  • Up your hands to the front so that your palms are facing down.
  • Do not bend your elbows and keep your hands straight parallel to the ground.
  • Now slowly bend your knees to a quarter-bend position and down your back like you are sitting on a chair.
  • Hold on to the position for 30 to 60 seconds.
  • Initially you would withstand in the position only to less seconds. On doing, you can grip to longer seconds.

Benefits of chair pose:

  • This pose is good for your hips, spine and chest muscles as it exercises them
  • It strengthens lower back and torso.
  • Muscles in the knee, the ankles, and the thighs get a good stretch and becomes strong.
  • Abdominal organs gets good massage and helps in proper functioning.
  • The tush part’s weight can be reduced on doing this asana.
  • Gives a good balance to the body.
  • Refreshes mind

Just a 1 minute posture can bestow you with lots of health benefits. Don’t forget to do it daily. Let’s spend just 60 seconds for our body’s well-being!

How to prepare yourself for your yoga practice

Before starting our daily practice it is important to talk about general preparation and conditions.

  1.  Preparation

Your preparation is as important as your practice, without a good preparation you will never be able to go in-depth of your practice.

Fix a time of day that works best for you, early morning or after sunset is the best. Find yourself a quiet place where you will not be disturbed, your practice room is your sacred space, have it always in order and clean. Have a shower before your practice and have at least three hours of distance from your last meal.

2 Diet

“you are what you eat”

Food is there to nourish body and soul, when taken it should be in harmony with Mother Earth. Eat a lot of fruits, vegetables, nuts, and grains. Their vibrations can easily be taken and transformed into our bodies. If possible go vegan, if not and you like to eat dairy products to your daily food, be sure to get it from an organic farm where the animals are treated with respect and have a harmonious life. This is all about the law of karma. The meat you should forget altogether. When consuming meat you are taking all the fear and pain of the animal into your body and soul, it’s a very impure and suffering energy, altogether a very low vibration.

3 Cleanness

Most of us think that we are clean by taking a shower, putting on clean clothes, cleaning the house, doing our daily practice, meditation, prayers, but how are our thoughts, Are our words or actions clean?

You can be in perfect harmony at home or by yourself but the moment something from outside triggers you, you have lost it, yes?

The same is with words, you can be sharing beautiful thoughts with someone but when gossiping or criticism starts you lose your purity and serenity.

Also with your actions, the moment your actions become selfish instead of selfless your Peace is gone. It is important to be thoughtful to yourself in words and action, acting according to your words is respecting yourself. Our thoughts have power, through thinking positively we are automatically spreading this vibration in our energy field, the same is also through for our negative thoughts. That is why it is important to learn to control the mind through your practice.

Your daily practice should not be limited to a few hours a day, your practice should be day and night.

Only through the control of the senses, you will find Peace, otherwise, you will be like a tourist sipping spirituality. This is fine but if you want more out of your practice you need self-discipline. For this, it is important to surround yourself with like-minded people with whom you can share.

Make your daily routine into meditation, be conscious about what you are doing, and be in the here and now.

Join our : Online Kundalini Yoga Teacher training, 200 Hour yoga Teacher training in rishikesh

Making Your Way Into Dhanurasana

The word“”Dhanurasanacomes from the SanskritDhanura which means “bow” andasana meaning“asana.” This yoga posture is named after the shape of the bow.“Above emotions can be expressed in this physical posture as we melt and accept, soft stretch, and mold our body in a strong bow.connected with Urdhva Chakrasana Happened, Dhanurasana combines Cobra and Locust posture and counter forward Bends and plows. Like the

archer’s bow, or Arjuna as advised by Lord Krishna in the Mahabharata, this position gives stability and confidence. One has to pull back and hold the legs, then lift the head, chest and thighs together to form a curve or bow shape. This asana improves vitality, spinal elasticity and posture. This spine. Tones the muscles of the spine, works each part of the spine – the cervix, lumbar, thoracic and sacrum. As the chest is fully bent and the lungs expanded, we increase the strength and capacity of the lungs.increase in.

eighth posts Keanukrm, TheHatha Yoga 12 original The three back-enhancing Last of the exercises. Produces bow confidence. Moreover, it will break like a real bow, which is too much stress, and significant stress Without, there will not be enough force to launch the arrow, therefore, this posture requires the right balance of effort and relaxation.

Dhanurasana should be practiced after the use of followed by a reclining Bhujangasana (cobra) and Shalabhasana (grasshopper) posture as a counter-stretch.

To perform this asana, you need to lie down on your abdomen, forehead on the floor, legs together and arms by your sides.

  • Bend/fold the knees, bringing the feet as close to the posterior as possible.
  • Grasp either your feet or ankles with the hands. Knees and thighs should be as close together as possible. If one is not able to keep them together, then separate as much as needed.
  • Press the heels into the hand so that the latter press against the action.
  • Altogether, lift the head chest and thighs off the floor.
  • Ensure that the tailbone is kept pressed towards the back of the knees and press the shoulder blades firmly down the back.
  • Keep your elbows straight, with the arms fully stretched and the weight of the body on the abdomen. Do not rock back on the hips.
  • Breathing in and out smoothly, ensure your chest is well off the ground and your legs are pulled up. Even if the thighs come apart, try and keep the big toes of both feet together or close. Keep the head lifted, looking upwards . Maintain the posture for 5 long breaths ensuring that the right amount of effort is being used. Your body should be as taut as a bow.
  • After the five breaths, release and gently bring the legs and chest to the ground. Let go of the ankles and relax.

Breathing Techniques: Why are they important to yoga?

Pranayama (breathing technique) is an important practice of Hatha Yoga, which is the mother of all physical or postoperative yoga. They are such a prominent device in the tradition that the word hatha itself is closely associated with it. Have to understand how?

What is the meaning of pranayama?

The word pranayama can technically be translated as breath control (prana =breathing, yama =control). However, it is also associated with a broader interpretation in Hatha Yoga texts. life Stands for vitality of Antrnihitawrsbd  of all life activities Ayama means the entire region. Therefore, Pranayama techniques are practiced to introduce us to the whole field of life-force that is present in all life-activities. Once we come to know that we are soon able to purify, harmonize and finally control it.

But why is it an important practice in Hatha Yoga?

-Skti(Pranpran)revolves around our body layers through specific channels Jinhenkha is nerves.There are 3 main nadis: Pingala Nadi, Ida Nadi and Sushumna Nadi.

Pingala Nadi, The Sun and Hat of Hatha

All life-activities require energy which breaks down and gives heat to Pingala Nadi. This channel starts from the right side of the base of the spine and ends at the right nostril. It has the Sun as a symbol and is associated with HaHatthedathatha,

nadi, the moon and

energy is needed to conserve theall life-activities and consequently is associated with the coolness Ida nadi. This channel starts from the left side of the base of the spine and ends at the left nostril. Itthe moon as a symbol and hands linked wasMensbd.

Both channels travel upward in a spiral way, which means they move from right to left and right. The term hattha stands for these two opposing channels (nadis), the sun and the moon, and in a broader perspective, the process of bringing harmony between contrasts to reach final equilibrium. Ultimately, it is only when these channels are balanced that the path towards this final equilibrium opens. In other words, when Pingala Nadi and Ida Nadi are balanced, our main channel opens: Susumna Nadi.

Susumna pulse is the channel that lies in the middle of the spine. Kundalini Jagaran Jagran of (orour Prana-Shakti) stands for the opening of this main channel. This whole process brings about a complete transformation that leads to the attainment (towardssamadhithe ultimate goal of yoga). We can understand perception as the experience of self-recognition as being with the universe. This is achieved when the Kundalini Nesse has traveled spinal cord , reaching the highest center in theand brain.

Therefore, Pranayama is a major practice that balances our energetic channels (nadis) andour Kundalini leadsinto the final path towards enlightenment.

Pranayama (breathing technique) is an important practice of Hatha Yoga, which is the mother of all physical or postoperative yoga. They are such a prominent device in the tradition that the word hattha itself is closely associated with it. Have to understand how?

What is the meaning of pranayama?

The word pranayama can technically be translated as breath control (prana =breathing, yama =control). However, it is also associated with a broader interpretation in Hatha Yoga texts. life Stands for vitality of Antrnihitawrsbd  of all life activities Ayama means the entire region. Therefore, Pranayama techniques are practiced to introduce us to the whole field of life-force that is present in all life-activities. Once we come to know that we are soon able to purify, harmonize and finally control it.

But why is it an important practice in Hatha Yoga?

-Skti(Pranpran)revolves around our body layers through specific channels Jinhenkha is nerves.There are 3 main nadis: Pingala Nadi, Ida Nadi and Sushumna Nadi. Pingala Nadi, The Sun and Hat of Hatha

All life-activities require energy which breaks down and gives heat to Pingala Nadi. This channel starts from the right side of the base of the spine and ends at the right nostril. It has the Sun as a symbol and is associated with Ha Ha tthedathatha, nadi, the moon and

energy is needed to conserve theall life-activities and consequently is associated with the coolness Ida nadi. This channel starts from the left side of the base of the spine and ends at the left nostril. Itthe moon as a symbol and hands linked wasMensbd.

Both channels travel upward in a spiral way, which means they move from right to left and right. The term hattha stands for these two opposing channels (nadis), the sun and the moon, and in a broader perspective, the process of bringing harmony between contrasts to reach final equilibrium. Ultimately, it is only when these channels are balanced that the path towards this final equilibrium opens. In other words, when Pingala Nadi and Ida Nadi are balanced, our main channel opens: Susumna Nadi.

Therefore, Pranayama is a major practice that balances our energetic channels (nadis) andour Kundalini leadsinto the final path towards enlightenment.

Susumna pulse is the channel that lies in the middle of the spine. Kundalini JagaranJagran of (orour Prana-Shakti) stands for the opening of this main channel. This whole process brings about a complete transformation that leads to the attainment (towardssamadhithe ultimate goal ofyoga). We can understand perception as the experience of self-recognition as being with the universe. This is achieved when the Kundalini Nesse has traveled spinal cord , reaching the highest center in theand brain.

https://samadhiyogaashram.com/online-kundalini-yoga-teacher-training.php
Design a site like this with WordPress.com
Get started